 Save
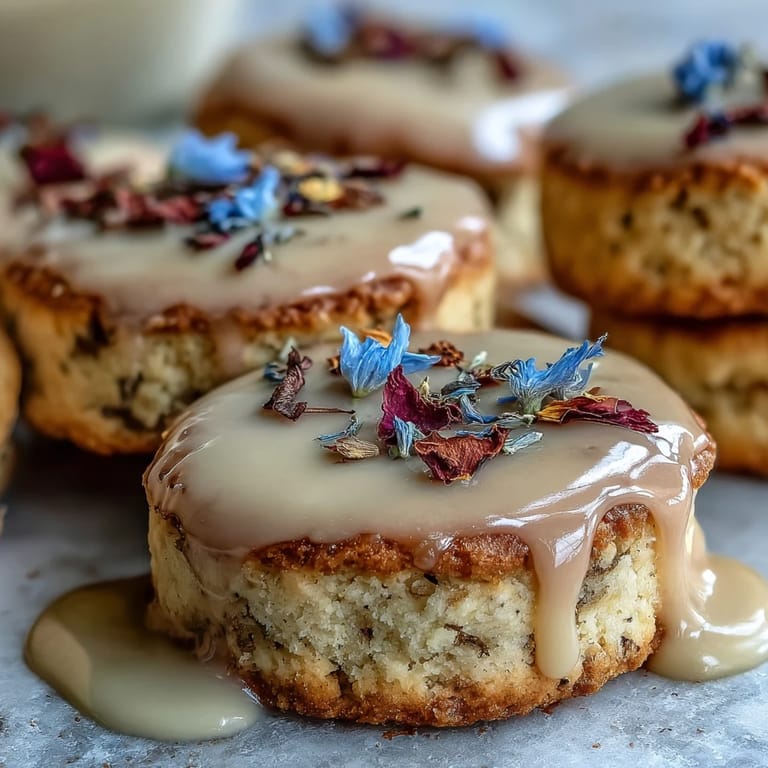
Save My neighbor knocked on my door one spring afternoon with a baby shower invitation and the sweetest request: could I bring something special? I'd been experimenting with flower-shaped cookies that week, and something about their delicate form felt exactly right for celebrating new life. The soft pastels I piped onto each one turned the kitchen into this peaceful, unhurried space—no rushing, just the satisfaction of creating something beautiful that others would actually eat.
I'll never forget watching my coworker's daughter's face when she saw the cookies on the shower table—she immediately pointed at them and wouldn't stop talking about the flowers. That moment made me realize these aren't just cookies; they're tiny edible gifts that somehow say 'someone cared enough to make something pretty.'
Ingredients
- All-purpose flour (2 1/2 cups): The foundation of structure; make sure to whisk it with the leavening agents so you don't end up with dense cookies.
- Baking powder (1/2 teaspoon): Just enough lift to keep them tender without making them rise too much and lose their shape.
- Salt (1/4 teaspoon): Brings out the vanilla and butter without tasting salty—trust it even though it seems tiny.
- Unsalted butter (3/4 cup), softened: Room temperature is non-negotiable here; cold butter won't cream properly and you'll end up with gritty cookies.
- Granulated sugar (3/4 cup): The beating stage with butter is where the magic happens; don't skip those 2-3 minutes of mixing.
- Large egg: Room temperature helps it blend seamlessly into the dough instead of making it feel curdled.
- Pure vanilla extract (2 teaspoons): The flavor you taste in every bite, so use the real thing, not imitation.
- Powdered sugar (3 cups), sifted: Sifting removes lumps that would make your icing grainy and chalky.
- Meringue powder (2 tablespoons): This is what gives royal icing that glossy finish and helps it dry hard without cracking.
- Water (4-5 tablespoons): Add gradually; the consistency you're after is thick enough to hold a shape but still spreadable.
- Pastel food coloring gels: Gel colors are concentrated so you won't thin out your icing the way liquid colors do, keeping it the right texture.
Tired of Takeout? 🥡
Get 10 meals you can make faster than delivery arrives. Seriously.
One email. No spam. Unsubscribe anytime.
Instructions
- Mix the dry ingredients:
- Whisk flour, baking powder, and salt together in a bowl, making sure everything is evenly distributed. Setting this aside means you won't overmix when you combine everything later.
- Cream butter and sugar:
- Beat them together for a full 2-3 minutes until the mixture looks pale and fluffy, like soft clouds. This is when air gets incorporated into the dough, which gives you those tender cookies.
- Add egg and vanilla:
- Beat them in until the mixture is smooth and combined, scraping down the bowl as needed. Don't worry if it looks slightly broken at first; keep mixing and it'll come together.
- Bring it together:
- Add the dry ingredients gradually to the wet mixture, stirring just until you don't see white streaks anymore. Overmixing develops gluten and makes cookies tough, so stop as soon as everything is incorporated.
- Chill the dough:
- Flatten the dough into discs, wrap them, and refrigerate for a full hour so the gluten relaxes and the dough becomes easier to work with. If you skip this step, your cookies will spread too much in the oven.
- Prepare to bake:
- Preheat your oven to 350°F and line baking sheets with parchment paper so nothing sticks. This temperature is gentle enough to keep the centers soft while the edges develop color.
- Roll and cut:
- Work with one dough disc at a time on a lightly floured surface, rolling to 1/4-inch thickness. Use a flower cutter that you've dipped in flour to prevent sticking, and place cookies an inch apart since they'll spread slightly.
- Bake with attention:
- Bake for 10-12 minutes until the edges just turn golden but the centers still look slightly underbaked—they'll firm up as they cool. Leave them on the sheet for 5 minutes so they set up, then move to a rack to cool completely.
- Make the royal icing:
- Whisk powdered sugar and meringue powder together, then add water one tablespoon at a time until you reach the right consistency. It should hold a shape when piped but smooth out slightly when spread.
- Color your icing:
- Divide the icing into small bowls and add pastel gel colors drop by drop, mixing well between additions. Gel colors are potent, so a tiny amount goes a long way.
- Decorate and set:
- Spread or pipe icing onto completely cooled cookies, letting your creativity guide you. Let the icing dry for several hours before stacking or packaging so it hardens properly.
 Save
Save There's something almost meditative about piping tiny details onto cookies, watching them transform from simple shapes into something that feels precious. It reminded me that making food for others is its own kind of love language.
Why These Cookies Feel Special
The magic of these cookies isn't just in the eating—it's in the making and the giving. They sit in that sweet spot between fancy enough to impress and simple enough that you're not stressing in the kitchen. When you hand someone a box of flower cookies you've decorated yourself, you're offering something more thoughtful than store-bought ever could be.
Flavor Variations That Work
I've played around with this dough a fair amount, and it's remarkably flexible. A drop or two of almond extract in the dough adds this subtle, almost floral note that pairs beautifully with pastel icing, giving everything an extra touch of sophistication. Lemon zest brightens things up if you're going for a spring vibe, and a tiny bit of rose water in the icing creates something almost magical without being overdone.
Storage and Gifting Tips
These cookies stay fresh for about five days in an airtight container at room temperature, which is perfect for making them a day or two before an event. I've learned to wait until the icing is completely set before stacking them, or they'll stick together and leave you disappointed. Line each layer with parchment paper if you're stacking multiple cookies, and they'll stay beautiful until the moment someone opens the box.
- Keep cookies away from humidity; moisture will soften the icing and make everything stick together.
- If you're shipping these, wrap each cookie individually in tissue paper before placing in a box with padding around the edges.
- These pair wonderfully with herbal teas, sparkling lemonade, or even champagne at celebrations.
 Save
Save These cookies have become my go-to gift for spring celebrations and moments when I want to brighten someone's day. There's genuine joy in making something that's both beautiful and delicious, then watching it bring happiness to the people you care about.
Recipe FAQ
- → What gives the cookies their delicate texture?
The dough is chilled before baking, allowing the butter to firm up and helping create a tender, crisp texture once baked.
- → How is the pastel icing made smooth and spreadable?
Royal icing combines powdered sugar, meringue powder, and water gradually, mixed until it reaches a thick yet spreadable consistency.
- → Can the dough be flavored differently?
Yes, adding a drop of almond extract offers a subtle, complementary flavor without overpowering the vanilla base.
- → What tools are recommended for decorating the cookies?
Piping bags with small round tips help achieve detailed flower decorations, enhancing the pastel icing's appearance.
- → Are there suitable substitutions for dairy ingredients?
Plant-based butter can replace unsalted butter to make these treats dairy-free, maintaining texture and flavor.