 Save
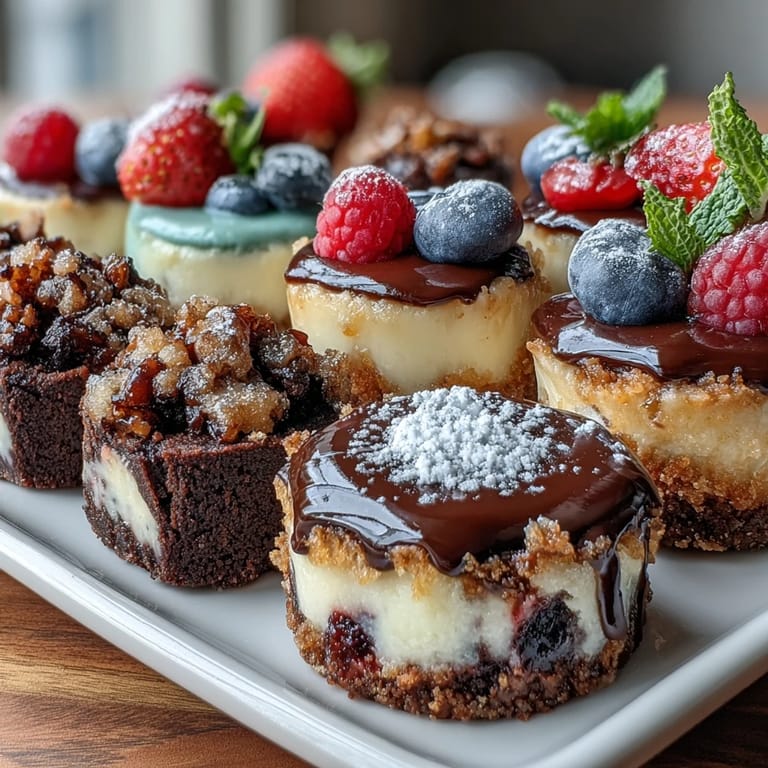
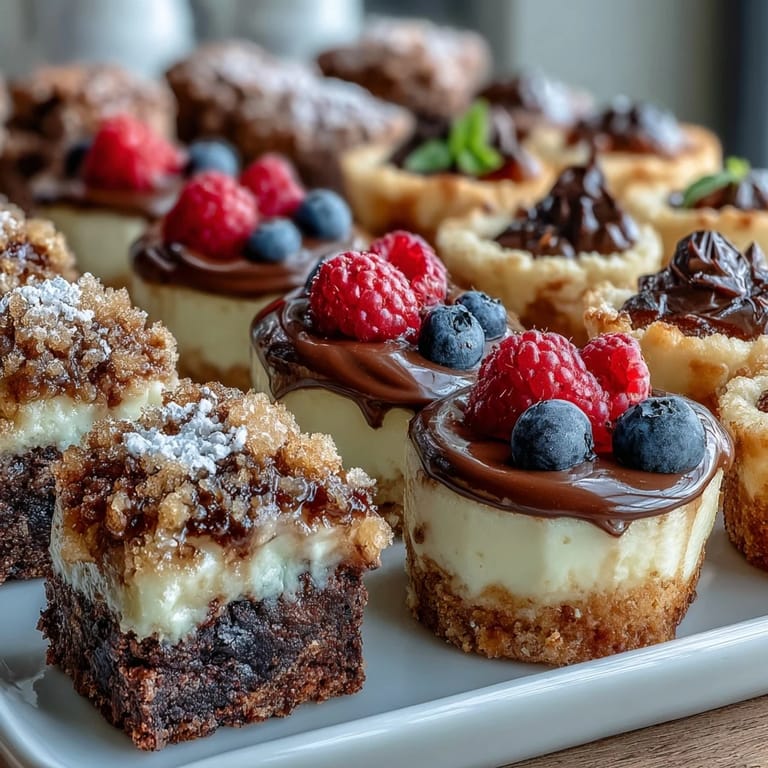
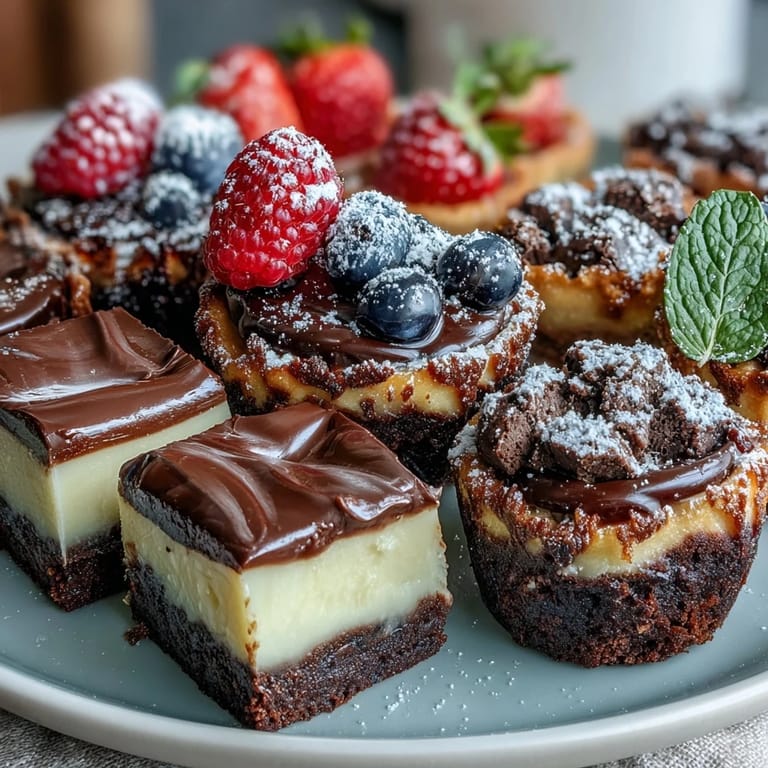
Save My friend texted me a photo of her new kitchen the morning after she'd closed on her house, and I knew exactly what I had to bring to her housewarming: something that said celebration without demanding she do the hosting work herself. That afternoon, I stood in my own kitchen arranging three different mini desserts on a tiered stand, realizing how perfect this was—tiny bites that let everyone taste everything, no commitment required. The brownie bites were dark and fudgy, the lemon cheesecakes had that perfect tang, and the fruit tartlets practically glowed under the kitchen lights. By the time I arrived at her place, I'd somehow become the unofficial dessert person at housewarmings, and honestly, I couldn't be happier about it.
What surprised me most was watching how a dessert bar completely changed the energy of a gathering. Instead of everyone hovering nervously in the living room, they naturally gravitated to the kitchen where the stand was, and suddenly there was laughter and people trading bites, debating which was their favorite. That's when I realized this wasn't just about the desserts—it was about giving people permission to linger, to taste, to have a moment together.
Ingredients
- Unsalted butter: For the brownies and tartlet dough, this lets each element taste like itself instead of competing with salt.
- Dark chocolate, chopped: Use something you'd actually eat on its own—that 70% bar you keep in the back of the pantry, not the cooking chocolate.
- Granulated sugar: Measure it properly and you'll notice the difference between fudgy and dense.
- Large eggs: Room temperature makes everything mix smoother and bake more evenly than cold eggs straight from the fridge.
- Vanilla extract: This is not the place to skip quality; it rounds out every single treat here.
- All-purpose flour: Don't overwork it once you fold it in or your brownies will taste like cake.
- Cream cheese, softened: Leave it out for at least an hour before beating it, or you'll have lumps in your cheesecake.
- Lemon juice and zest: Fresh lemon is absolutely necessary—bottled juice tastes tinny against the richness of cream cheese.
- Digestive biscuits or graham crackers: The crust is forgiving, so use whatever you have; it's really just a textural base.
- Ready-rolled shortcrust pastry: Buy the good kind if you can, but honestly even the basic frozen version works beautifully here.
- Whole milk: This creates the custard filling; don't use cream or it gets too heavy.
- Cornstarch: This thickens the custard without making it taste floury or weird.
- Assorted fresh berries: Buy them the day before or morning-of; they brighten everything and people always comment on the color.
Tired of Takeout? 🥡
Get 10 meals you can make faster than delivery arrives. Seriously.
One email. No spam. Unsubscribe anytime.
Instructions
- Set up your workspace:
- Preheat your oven to 180°C and grease or line three separate mini muffin tins—you'll be baking all three treats at slightly different times, which sounds chaotic but works surprisingly well. Having everything ready before you start melting chocolate is the kind of small decision that saves you ten minutes of stress later.
- Make the brownie batter:
- Melt your butter and chopped chocolate together—I prefer the double boiler method because it's gentler and you can feel when everything's actually smooth. Once it's silky, whisk in the sugar, eggs, and vanilla, then fold in the flour and salt just until combined; the second you stop seeing dry streaks, you're done.
- Bake the brownies:
- Divide the batter among eight mini muffin cups and slide them into the oven for 12 to 15 minutes. They should look set on top but still slightly wobbly in the center—that's the fudginess you're after. Let them cool in the tin completely or they'll fall apart.
- Build the cheesecake crusts:
- While the brownies are baking, mix your crushed biscuits with melted butter and press the mixture firmly into the bottoms of eight more mini cups. Don't be gentle; you want a solid base that holds together when you bite into it.
- Prepare the cheesecake filling:
- Beat softened cream cheese and sugar until smooth—about a minute or two with an electric mixer, or five minutes if you're doing this by hand. Add the egg, lemon juice, lemon zest, and vanilla, and mix just until everything's combined; overmixing incorporates too much air and can make it crack.
- Bake the cheesecakes:
- Spoon the filling over your crusts and bake for 12 to 15 minutes, until the edges look set but the very center still jiggles slightly when you gently tap the tin. They'll continue to set as they cool, and refrigerating them overnight makes them taste even better.
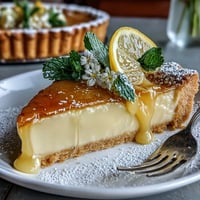
- Prepare the tartlet shells:
- Cut your pastry sheet into eight circles and press them gently into tartlet tins, pricking the bottoms with a fork so they don't puff up while baking. Bake for 10 to 12 minutes until they're golden and smell like butter.
- Make the custard filling:
- Whisk together milk, egg yolk, sugar, cornstarch, and vanilla in a saucepan and heat gently, stirring constantly, until it thickens enough to coat the back of a spoon. The whole process takes maybe five minutes and you'll feel like you're doing something very French.
- Fill and top the tartlets:
- Spoon cooled custard into each tartlet shell, then crown each one with fresh berries while they're still glistening. This is the moment where everything stops looking homemade and starts looking like you hired a pastry chef.
- Arrange everything beautifully:
- Arrange your three different treats on a tiered stand or platter, mixing them up so no two of the same are sitting next to each other. Fresh mint leaves scattered around add color and suggest you're someone who thinks about these things.
 Save
Save There's a moment right before people arrive when you step back and look at your dessert bar—the three colors, the arrangement, the little touches—and you feel something shift. You're not just bringing food; you're bringing an experience, a signal that this person and their new space matter enough to deserve something thoughtful. That feeling never gets old.
The Art of the Dessert Bar
A dessert bar works because it's inherently generous—three treats instead of one says you trusted your guests to know what they wanted. I've learned that people eat more adventurously when they have choices, and someone who normally skips dessert will absolutely try the lemon cheesecake if it's right there, tiny and perfect and unintimidating. The bar itself doesn't have to be fancy; even a wooden cutting board with three little sections works, or a simple white platter arranged with some breathing room between treats.
Timing and Make-Ahead Strategy
The beauty of this recipe is that almost everything improves with a day's notice. The brownie bites can be baked two days ahead and stored in an airtight container—they stay fudgy, somehow. The cheesecakes absolutely should be made ahead; refrigerating overnight lets the flavors settle and the texture firms up perfectly. Only the tartlets need final assembly on the day of, and even that takes ten minutes once the custard is cool.
Customizing for Your Crowd
One of my favorite things about this recipe is how flexible it is once you understand the basics. If someone mentions they don't eat chocolate, you can swap the brownie bites for something else entirely—lemon bars, coconut macaroons, whatever fits. If berries are expensive or out of season, the tartlets work beautifully with sliced stone fruit, a drizzle of honey, or even a sprinkle of candied lemon peel that catches the light.
- Seasonal swaps: Use raspberries in summer, sliced pears in fall, pomegranate seeds in winter.
- Flavor variations: A hint of almond extract in the custard, or a touch of cardamom in the brownie batter.
- Presentation tricks: A light dusting of powdered sugar, a tiny dollop of whipped cream, or even a whisper of edible gold leaf if you're feeling fancy.
 Save
Save This dessert bar has become my favorite way to celebrate someone's new beginning, whether it's a new house or just a dinner party that deserves something special. The fact that you made three different things somehow makes it feel more meaningful than bringing one perfect cake ever could.
Recipe FAQ
- → What are the main components included in the dessert bar?
It features mini brownie bites, lemon cheesecake cups, and fresh fruit tartlets, each offering unique flavors and textures.
- → How long does the entire preparation and baking take?
The process takes approximately 1 hour and 25 minutes, including baking and cooling times.
- → Can these treats be made in advance?
Yes, they can be prepared earlier and refrigerated, allowing flavors to develop and simplifying event day setup.
- → Are there suggestions for serving or pairing?
These mini sweets pair well with sparkling or sweet dessert wines and can be garnished with fresh mint or chocolate drizzle for extra flair.
- → What equipment is needed to assemble the dessert bar?
Mini muffin tins, tartlet pans, mixing bowls, a whisk, and optionally an electric mixer are useful for preparation and assembly.
- → Are there any common allergens in these treats?
They contain dairy, eggs, wheat gluten, and potentially soy depending on chocolate choice; always check ingredient labels for allergens.