 Save
Save My neighbor brought over a bag of candy apples last fall, and I bit into one expecting the usual sticky mess, but instead got this perfectly crisp slice that shattered between my teeth. The caramel gave way to that tart apple, then dark chocolate finished the whole thing off. I spent the next hour in my kitchen trying to recreate that exact moment, minus the wooden stick, figuring out that slices were actually easier to eat and somehow felt more sophisticated than the whole-fruit version.
I made these for my sister's book club last spring, and everyone stopped mid-sentence when they tasted them. Someone asked if they were homemade, and when I said yes, the room actually went quiet for a moment. That's when I realized these little slices had crossed from simple snack into something that felt special, the kind of thing people remember.
Ingredients
- Crisp apples (Granny Smith or Honeycrisp): You need apples that stay firm when you bite them, not ones that get mealy; the tartness also balances the sweet caramel and chocolate perfectly.
- Lemon juice: Just a light toss prevents your beautiful slices from turning brown while you work, a small step that makes the final presentation look intentional.
- Soft caramel candies: The unwrapped ones melt faster and smoother than trying to make caramel from scratch, though you could absolutely do that if you're feeling ambitious.
- Heavy cream: This loosens the caramel into a dippable consistency without watering it down, keeping that rich, cling-to-your-teeth quality.
- Dark chocolate (60–70% cocoa): Go darker if you love bold flavor, lighter if you prefer something sweeter; the cocoa percentage changes the whole personality of the bite.
- Coconut oil or unsalted butter: Either one thins the chocolate just enough to drizzle beautifully without breaking the caramel layer underneath.
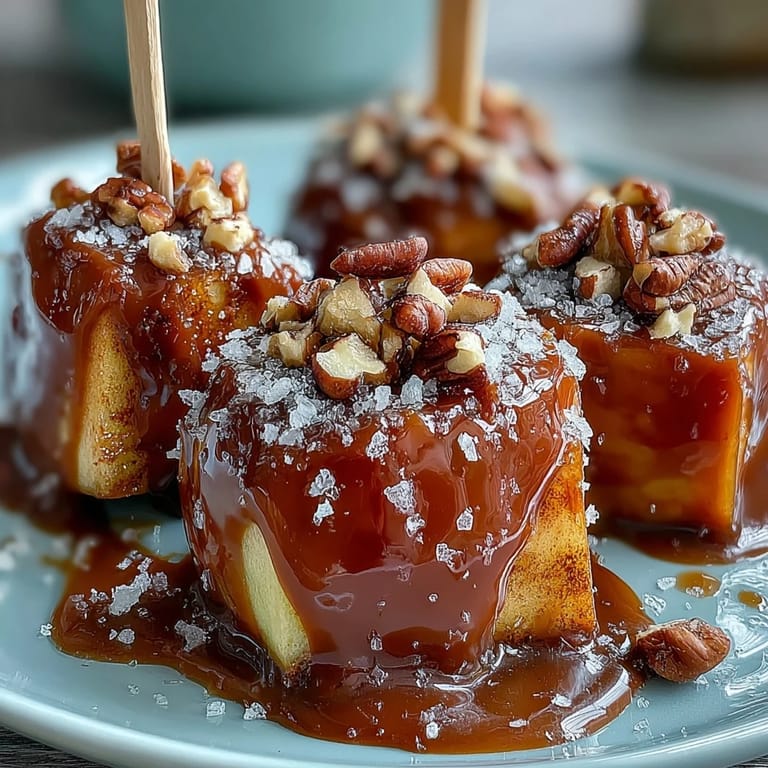
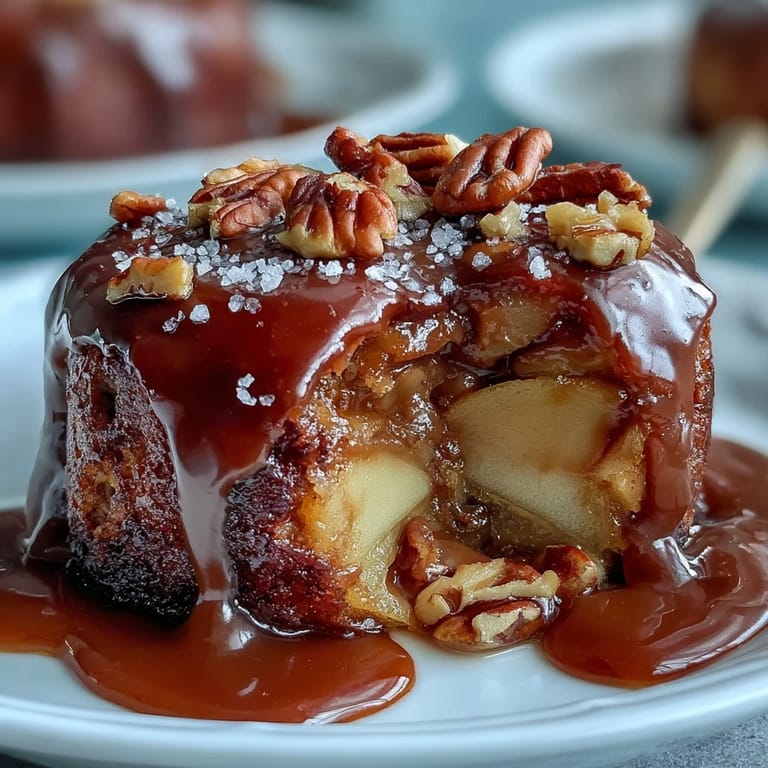
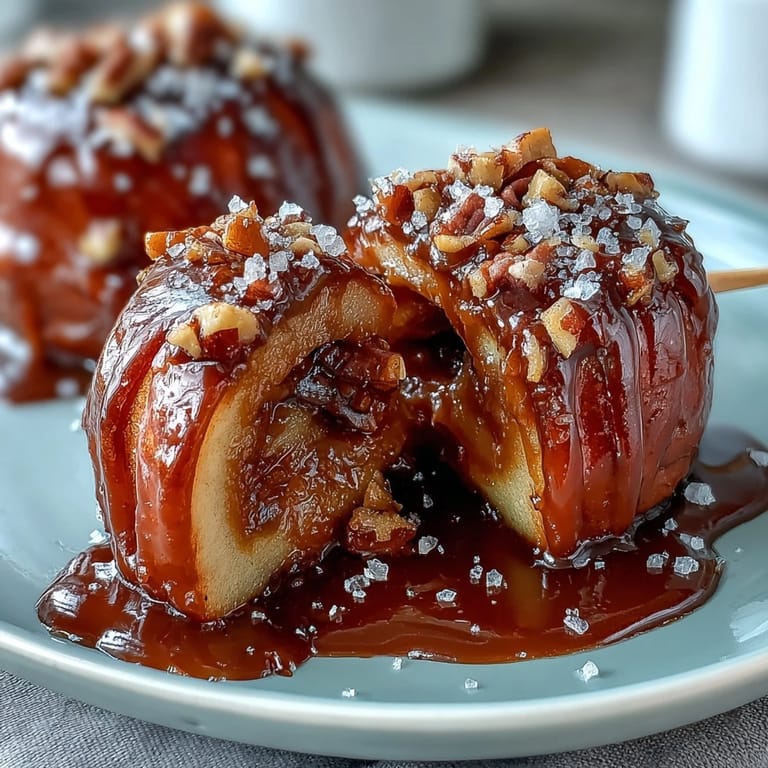
- Garnishes (nuts, sprinkles, sea salt): These are optional but they transform the dessert from simple to Instagram-worthy, plus they add texture and flavor dimension.
Tired of Takeout? 🥡
Get 10 meals you can make faster than delivery arrives. Seriously.
One email. No spam. Unsubscribe anytime.
Instructions
- Set up your station:
- Line a baking sheet with parchment paper and have all your tools ready before you start, because once the caramel is warm, things move fast. Toss your apple slices with lemon juice and pat them completely dry—wet apples won't hold the caramel properly.
- Stick your apples:
- Push a popsicle stick or sturdy skewer halfway into each slice so you have something to hold onto when dipping. This is the moment you realize why candy apple vendors always look so calm, because suddenly everything becomes manageable.
- Warm the caramel:
- Heat the unwrapped caramels with heavy cream over low heat, stirring constantly until you have a smooth, pourable consistency. Let it cool for a couple minutes so it's warm but not hot enough to slip right off your apple.
- Dip into caramel:
- Hold each apple slice by its stick and dip it halfway into the caramel, letting the excess drip back into the pot with a satisfying little swirl. You're aiming for a coating thick enough to see, not so thick that it overwhelms the apple flavor.
- Chill the caramel:
- Lay your coated slices on the parchment paper and pop them in the refrigerator for 5 minutes so the caramel sets and firms up. This step prevents the chocolate from sliding right off later.
- Melt your chocolate:
- In a microwave-safe bowl, heat the chopped dark chocolate with coconut oil in 20-second bursts, stirring between each one until completely smooth. Overheating chocolate is the fastest way to turn it grainy and sad, so patience here really matters.
- Drizzle with chocolate:
- Using a spoon or piping bag, create thin chocolate drizzles across each caramel-coated slice while they're still slightly cool. The contrast between the cold caramel and warm chocolate is part of what makes this feel fancy.
- Add your toppings:
- Immediately scatter your chosen garnishes over the wet chocolate so they stick properly. This is where you get creative and make each slice a tiny edible work of art.
- Final chill:
- Refrigerate for another 5 to 10 minutes until the chocolate firms up completely. They're best served cold straight from the fridge, but they're still delicious at room temperature if you've made them ahead.
 Save
Save My kid helped make these one rainy afternoon, and watching her carefully choose which sprinkles went on each slice made me realize these weren't just a dessert anymore. They became something we made together, something small enough to finish in one bite but meaningful enough to remember.
Why These Slices Beat Whole Candy Apples
Whole candy apples are gorgeous on a stick, but they're messy to eat and leave you with sticky hands and apple chunks between your teeth. Slices give you all the romance of a candy apple without requiring you to commit to finishing an entire fruit, plus they're easier to serve to a crowd and feel more refined somehow. You get the satisfying crunch of crisp apple, the pull of caramel, and the snap of chocolate all balanced in one perfect bite.
Storage and Make-Ahead Tips
These are genuinely best eaten the same day you make them while the apple is still at peak crispness, but you can prepare them up to 8 hours ahead and store them in an airtight container in the refrigerator. The caramel and chocolate won't go anywhere, but the apple will gradually soften, so think of them as something that's perfect fresh and still very good cold the next day. If you're planning to make them for a party, assemble everything except the chocolate drizzle and toppings, then finish them just a couple hours before serving.
Flavor Variations and Swaps
This recipe is honestly a canvas for whatever you're craving in a given moment. Use white or milk chocolate instead of dark if you want something sweeter, or go full cocoa with 85% dark chocolate if you love bitter notes that cut through the richness. You could swap the nuts for crushed pretzels for a salty crunch, or skip garnishes entirely and let the apple, caramel, and chocolate be the whole story.
- Toast your own nuts and chop them fine so they stick to the chocolate instead of rolling right off.
- If you can't find soft caramel candies, make a quick caramel sauce from scratch or use store-bought dulce de leche thinned with a splash of cream.
- Experiment with sea salt on half your batch and skip it on the other half so you can figure out your own preference.
 Save
Save There's something quietly wonderful about making something this elegant with ingredients you probably already have on hand. When someone bites into one of these and their whole face changes for just a second, you'll know exactly why you took the time to make them.
Recipe FAQ
- → What type of apples work best?
Crisp, tart apples like Granny Smith or Honeycrisp hold up well and provide a refreshing contrast to the sweet toppings.
- → How to prevent apple slices from browning?
Coat the apple wedges in lemon juice immediately after slicing to maintain their fresh appearance and crispness.
- → Can I substitute dark chocolate with another type?
Yes, milk or white chocolate can be used for a sweeter, milder flavor profile, though dark chocolate adds a rich bitterness that balances the caramel.
- → What are some garnish options?
Toasted nuts, colorful sprinkles, or flaky sea salt can add texture and enhance flavors without overpowering the core elements.
- → How long should I chill the coated apple slices?
Chill first after caramel coating for about 5 minutes, then again after drizzling chocolate for 5–10 minutes to set both layers properly.
- → Are these suitable for gluten-free diets?
Yes, if using gluten-free caramel and chocolate, these apple slices can be enjoyed gluten-free while keeping them vegetarian-friendly.