 Save
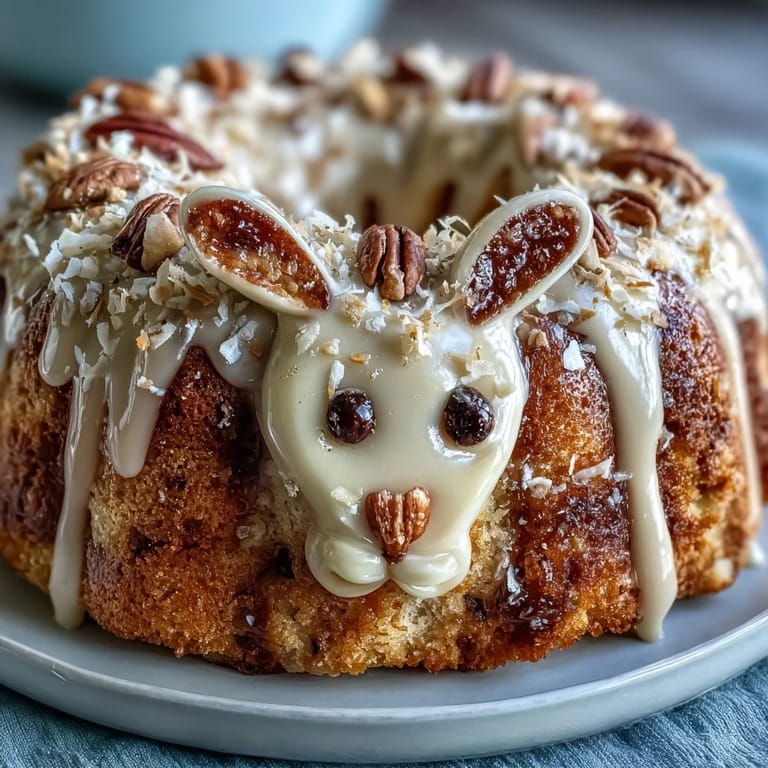
Save My daughter came home from school with a drawing of an Easter bunny she'd colored gold and pink, and I knew right then that our Easter table needed something magical to match her vision. That evening, I found myself sketching out how to turn a simple vanilla cake into a whimsical bunny, complete with coconut fur and marshmallow cheeks. The idea seemed ambitious but doable, and when I finally pulled those golden layers from the oven, the whole kitchen smelled like butter and vanilla in the best possible way. Something about creating a cake that looks like a character rather than just a dessert felt like I was baking a memory, not just treats.
I made this bunny cake for my nephew's birthday party last spring, and watching a roomful of five-year-olds gasp when I set it on the table was an unforgettable moment. One little girl asked if she could pet it before we cut it, and her serious concern about hurting the bunny made me realize this cake had become something more than just dessert. By the end of the party, kids were asking their parents if they could make one at home, which felt like the highest compliment I could get.
Ingredients
- All-purpose flour (2 ½ cups): This is your cake's foundation, and measuring it properly makes the difference between dense and fluffy.
- Baking powder (2 ½ tsp): Make sure yours is fresh because old baking powder won't give you that light, airy crumb.
- Unsalted butter (1 cup for cake, plus 1 cup for frosting): Softening it to room temperature means it creams properly and creates pockets for air.
- Granulated sugar (2 cups): This sweetens the cake and helps trap moisture, keeping it tender even a few days later.
- Eggs (4 large, room temperature): Cold eggs don't incorporate smoothly, so let them sit out for 20 minutes before you start mixing.
- Pure vanilla extract (1 tbsp cake, 1 tbsp frosting): The pure stuff makes a noticeable difference in flavor compared to imitation.
- Whole milk (1 cup): This adds tenderness and helps balance the richness of the butter and eggs.
- Powdered sugar (4 cups, sifted): Sifting removes lumps and gives you smoother, fluffier frosting.
- Sweetened shredded coconut (1 cup for fur): This creates that fluffy texture and makes the bunny feel three-dimensional and playful.
- Pink gel food coloring: Gel coloring is more concentrated than liquid, so a tiny bit goes a long way without thinning your frosting or coconut.
- Gold sprinkles and edible glitter: These catch the light and make the cake feel festive and special.
- Marshmallows, licorice laces, and candies: These decorative elements turn your frosting canvas into a character with personality.
Tired of Takeout? 🥡
Get 10 meals you can make faster than delivery arrives. Seriously.
One email. No spam. Unsubscribe anytime.
Instructions
- Set up your workspace:
- Preheat your oven to 350°F and grease both round cake pans well with butter or cooking spray, then dust with flour so nothing sticks. Having everything ready before you start mixing means you won't scramble when the batter is ready to bake.
- Combine dry ingredients:
- Whisk flour, baking powder, and salt together in a medium bowl, breaking up any lumps so the baking powder distributes evenly. This step prevents dense pockets from forming in your finished cake.
- Cream butter and sugar:
- Beat softened butter and sugar together for 3 to 4 minutes until it looks pale, fluffy, and noticeably lighter than when you started. You'll actually hear the mixer change pitch when enough air has been incorporated.
- Incorporate eggs one at a time:
- Add each egg individually and beat well after each addition, making sure each one is fully mixed in before adding the next. This creates a stable emulsion that traps air and keeps your cake light and tender.
- Add vanilla and alternate wet and dry:
- Mix in vanilla, then add flour mixture and milk in alternating additions, starting and ending with flour. Overmixing at this stage creates tough gluten strands, so mix just until combined and stop when you see no streaks of flour.
- Bake with confidence:
- Divide batter evenly between pans and bake for 30 to 35 minutes until a toothpick comes out clean and the cake springs back when lightly touched. Oven temperatures vary, so start checking at 28 minutes to avoid overbaking.
- Cool properly:
- Let cakes cool in pans for 10 minutes (they'll firm up), then turn them out onto wire racks to cool completely. Cooling on racks instead of pans allows air to circulate underneath and prevents the bottom from getting soggy.
- Make buttercream frosting:
- Beat softened butter until creamy, then gradually add sifted powdered sugar, milk, vanilla, and salt, beating until fluffy and smooth. The gradual addition prevents powdery lumps, and the whole process should take 3 to 5 minutes of steady beating.
- Cut and arrange the bunny shape:
- Place one cake round flat as the bunny's face, then cut two ovals from the second round for ears and use any remaining piece for a bowtie. Arrange these pieces on a large platter to form a bunny shape, using a little frosting as glue between pieces.
- Apply crumb coat:
- Spread a thin layer of frosting over the entire bunny to seal in crumbs, then refrigerate for 20 minutes. This base layer prevents crumbs from getting caught in your final frosting.
- Frost generously:
- Apply a thick, even final coat of frosting to all exposed cake surfaces, using an offset spatula to smooth and blend edges. Take your time here because smooth frosting is what makes the decorations look intentional rather than accidental.
- Add fur and facial features:
- Press shredded coconut onto frosted areas, tint some coconut pink for inner ears and nose, position marshmallows for cheeks and teeth, and use licorice or gel icing for whiskers and eyes. Step back occasionally to check proportions and make sure your bunny is looking cheerful.
- Finish with sparkle:
- Scatter gold sprinkles across the bunny and serve with pride knowing you've created something genuinely whimsical and handmade.
 Save
Save My most vivid memory of this cake wasn't from a party but from an ordinary Tuesday afternoon when my son asked if we could make the bunny cake together. We frosted it with his help, and while his marshmallow placement was chaotic and his coconut application was more aggressive than artful, the result felt infinitely more special because we'd created it as a team. That cake taught me that the real magic isn't in perfect decoration—it's in the laughter and mess and tiny hands reaching for gold sprinkles.
Why This Cake Works for Every Occasion
Beyond Easter, this bunny cake works for spring celebrations, children's birthdays, and any time you want something that feels handmade rather than store-bought. The vanilla cake is mild enough that even picky eaters enjoy it, and the combination of cake and frosting feels indulgent without being overwhelming. I've also made this cake for baby showers where guests went wild over the whimsy, and for a friend's garden party where it became the most photographed dessert on the table.
Customizing Your Bunny
The beauty of this cake is that it invites creativity and personalization without requiring any advanced decorating skills. You can adjust the color scheme to match your party—blue frosting with white coconut for a winter bunny, or pastels for a garden party vibe. The marshmallow features can be customized with different candies, and the sprinkles can be swapped for edible glitter, pearl dust, or even mini chocolate chips if you want a different aesthetic.
Storage, Variations, and Final Touches
This cake keeps well because the frosting and cake both have enough fat to stay moist—covered at room temperature for up to 2 days, or refrigerated for up to 5 days if you need extra time. For a chocolate version, replace half a cup of flour with unsweetened cocoa powder and add an extra tablespoon of milk to keep it tender. Serve this cake with sparkling lemonade or a light dessert wine, and watch how the gold catches the light when you bring it to the table.
- If you make this cake a day ahead, frost it the morning of your event so the buttercream stays fluffy and fresh.
- Extra buttercream can be stored in an airtight container in the refrigerator for up to a week and re-whipped before using.
- Always double-check that your sprinkles and food coloring are allergen-free if you're serving guests with dietary restrictions.
 Save
Save This cake proves that homemade magic doesn't require fancy equipment or professional training—just butter, sugar, a little patience, and willingness to have fun with decoration. Make this bunny and watch the joy spread from the moment people see it.
Recipe FAQ
- → What flour type is best for this cake?
All-purpose flour provides the right balance for structure and tenderness in this vanilla cake.
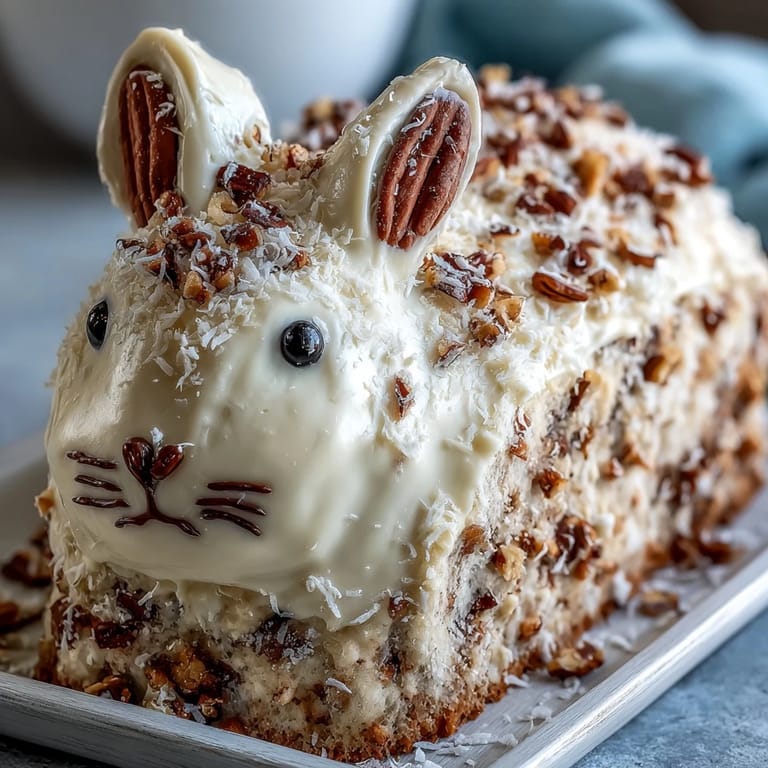
- → How do you achieve the bunny shape?
The cake is baked in two round pans. One round is used for the face, while the other is cut into ear shapes and a bowtie, then arranged accordingly.
- → What gives the fur its fluffy look?
Sweetened shredded coconut is pressed onto the frosting to create a textured, fluffy fur appearance.
- → How can I add color to the bunny ears and nose?
Small amounts of coconut are tinted with pink food coloring and applied to mimic the appearance of ears and nose.
- → What ingredients provide the cake’s moisture?
Butter, milk, and eggs combine to keep the cake moist and tender throughout baking.
- → Any tips for decorating with gold sprinkles?
Apply gold sprinkles evenly after frosting to add a festive sparkle without overwhelming the design.